03/12/2020

Why not add the subtitles straight to the video (hardcoded)?
The issue with hardcoded subtitles is that screen readers can’t see the text – it's just an image to them if hard-coded – and so uploading a subtitle file separately makes it more accessible, as well as allowing people to customise the way subtitles appear on their devices so they can make sure the display works for them.
It also makes it easier to go back and edit them in the future if you spot a mistake. No need to re-render the whole video, just update the subtitles file.
Where do I start?
Both YouTube and Facebook have tools to create subtitles.
YouTube
Upload your video to Youtube
- Sign in to YouTube Studio
- Click on the video icon in the top right menu to upload your video
- Once uploaded, from the left-hand menu, select Subtitles
- Click Add
From here, there are a few ways to create subtitles
Automatic captions may be the easiest way to add subtitles, but they may not be as accurate, so check and edit if necessary before publishing the video. Automatic subtitles may not appear straight away, depending on the length and complexity of the video. If they haven't appeared yet, wait and check back later.
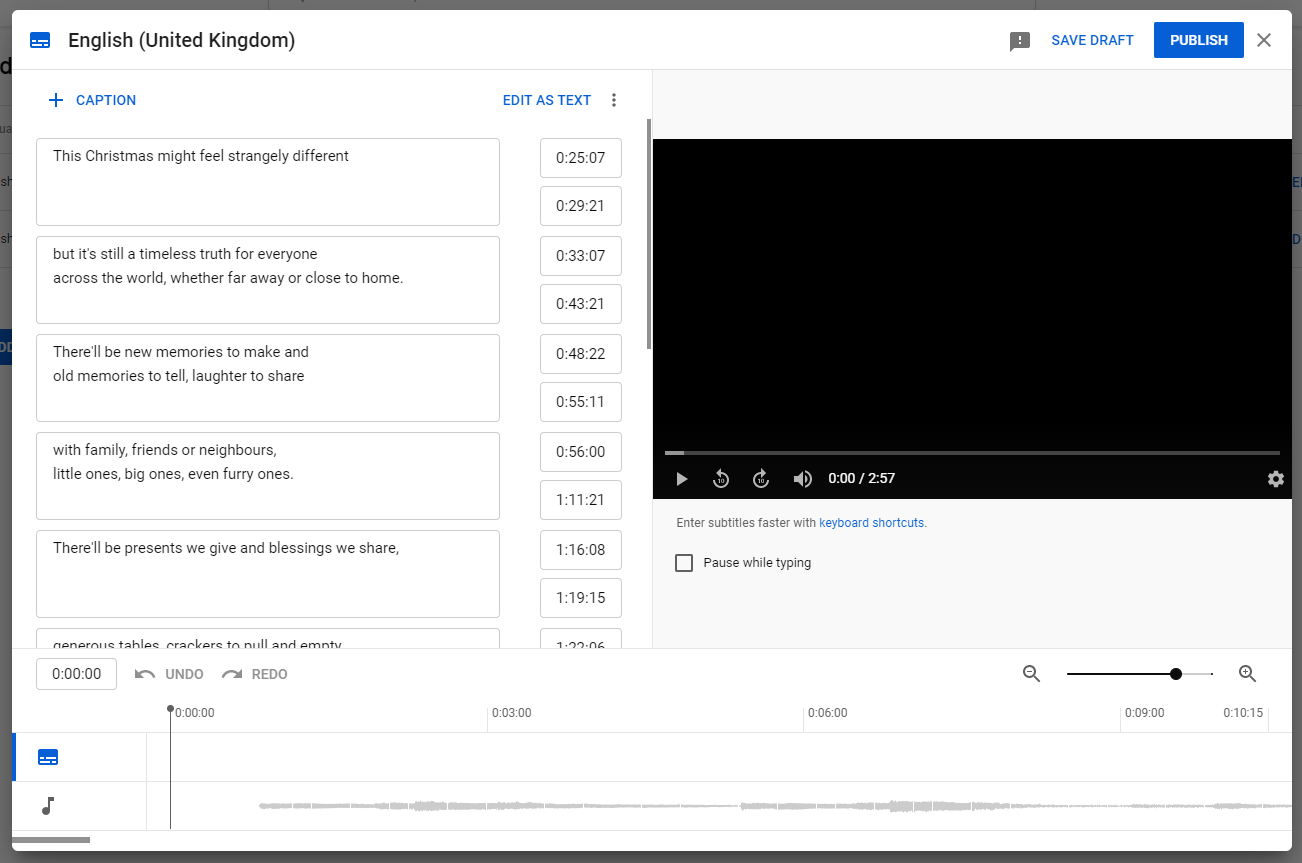
How to review automatic captions and make changes, if needed
- Sign in to YouTube Studio.
- From the left-hand menu, select Subtitles.
- Click the video that you want to edit
- Click Edit to edit the subtitles for this video
- Watch the video and edit the captions in the left hand fields
- Once finished, click Publish to make the edit live on the video subtitles
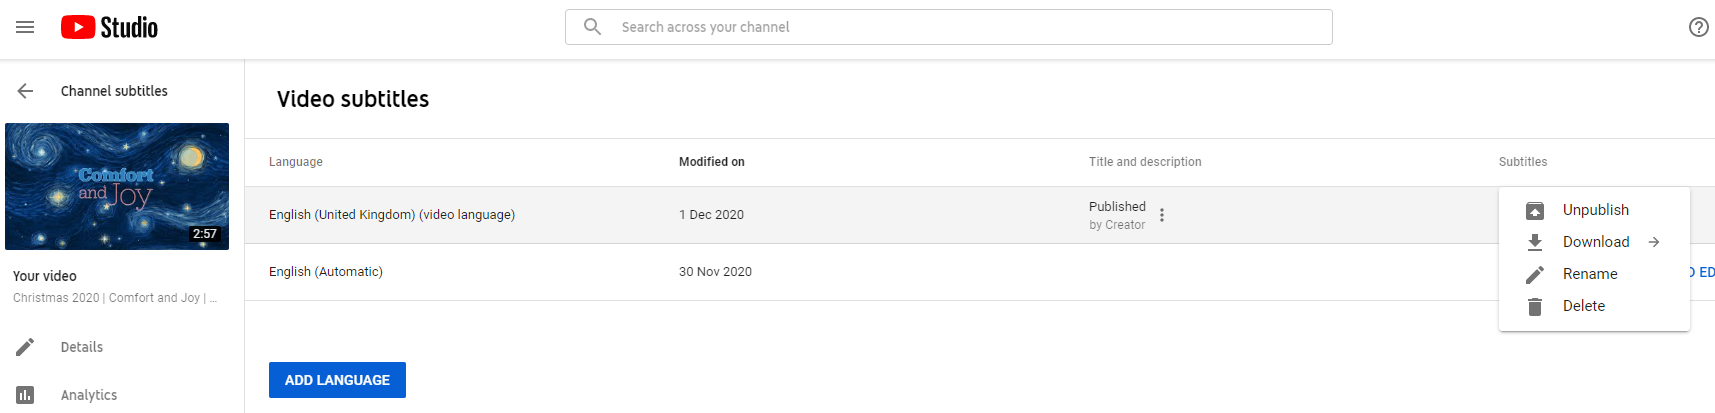
Once finished, download the .srt file to use the captions with the video on another platform.
- In the left hand menu, select Subtitles
- Select the video then click on the three dots next to Edit
- Select Subtitles then .srt
Download the .srt file from YouTube as instructed above. You can then upload this to your Twitter video. To do this:
- Click your icon in the top right-hand corner of Twitter and select Media Studio from the dropdown list
- Upload the video you want to share or select the video that has already been uploaded
- Select the Subtitles tab
- Click Upload and then choose the .srt file from your computer.
This will automatically save and will then be showing subtitles on your video.
Read more about captions on Twitter here.
Facebook captions
Add captions to a video using the .srt file downloaded from YouTube, following the instructions above.
Prepare the file for uploading
Before you upload the .srt subtitles to Facebook, the file requires renaming to tell Facebook which language has been used. To do this, simply replace .srt with .en_US.srt for example: ComfortandJoy.en_US.srt
To add captions to a video shared on your church Facebook page:
- Go to your church's page on Facebook
- Click Creator Studio and then Upload video
- Choose a video from your computer and click Open
- Click Subtitles and Captions on the right-hand side
- Click Upload and select the.srt file from your computer
- Click Save.
The subtitles will appear in the Captions Added section. Click on the added subtitles to be taken to Facebook’s subtitle editor. From here you can double-check that it’s also working on Facebook and make any changes if necessary and then save them.
Finally, select a default language and save the video.
To remove captions from a video you've uploaded:
- Click your video to expand it.
- Click the three dots in the top right and select Edit video.
- Next to Captions click the X next to the file you want to remove.
- Click Save.
Unfortunately, subtitles on Instagram don’t work in the same way as they do on Facebook, Twitter or YouTube. Depending on where you are sharing the video, will determine how you add the subtitles.
Subtitles on IGTV
First, upload your video to IGTV
- Tap your profile image and then + in the top menu
- Select IGTV video to open your camera roll
- Select the video you would like to upload and then Next
- Enter a title and description
To add automatic captions to the video
- Tap Advanced settings and select Captions to turn on automatic video captions
- Select Done in the top right to complete
Subtitles on a video posted to your Grid, Instagram stories or Reels
Unfortunately, it is not possible to add automatic captions to a video on your grid or Instagram stories, however, there are apps that can help you add the captions before you post.
Type your own on Stories or Reels
In the Instagram app, use the type tool to add a caption to your Story post or Reel so that viewers can engage with your video without turning the sound on
Apple Clips is a free app available on the Apple App Store, however, it is not available to Android users. Whilst it is free and easy to use, there are a few things to be aware of. It only records square video, and the video must be recorded within the app for the subtitles to be generated.
To create a video with subtitles:
- Download Apple Clips in your app store here
- Open the app and select camera
- Press the speech bubble icon in the bottom left of the screen. From here, choose the style of your subtitles. When selected, press the x icon to close
- Press the star icon on the right-hand side of the screen. If you wish, you can choose filters and stickers for your video. Press the x icon to close when finished
- To record your video, press the pink button and slide upwards. As you start talking, subtitles will be created by the app, which will appear on the screen as you talk
- When finished, press the square pink button to stop recording.
Your recorded video will appear at the bottom of your screen. Press on the video to select it. From here you can preview your video, add additional stickers, filters, or emojis and trim your video to tidy up the beginning and ends.
- Finally, press Save clip to download it to your photo library. From here, you can upload to Instagram.
This app adds automatic captions as you record a video for Instagram stories. Learn more about it here.
Any easy tool to add subtitles to video, quicc.io is free to use for ten-minutes worth of content. You can review the captions before they're burned in, as well as changing the font style and colour.
If you have any app suggestions you'd like to share with us, we’d love to hear from you! Share them with us on Twitter and Facebook.
Keep up to date with all things digital and join our Digital Labs newsletter